
Monday, August 30, 2010
Happy Birthday Card
Friday, August 27, 2010
Matching Boy & Girl Cards

I love the whole brown and blue/pink look, so when I saw this paper I had to buy it. These cards are super easy to make. You'll need two sheets of corresponding prints, a small piece of a solid color, a small piece of white paper and some ribbon.

I used my brown ink to chalk around the edges of the blue/pink and white paper to give it a border and then stamped "smile" and "celebrate", but you could print off the words from your computer and use a marker to mark the edges if you don't have any stamping supplies. Use glue dots to hold the ribbon on and you can place it higher up or lower down depending on how you want your paper to show. My niece loved this card when I gave it to her for her birthday!

Friday, August 20, 2010
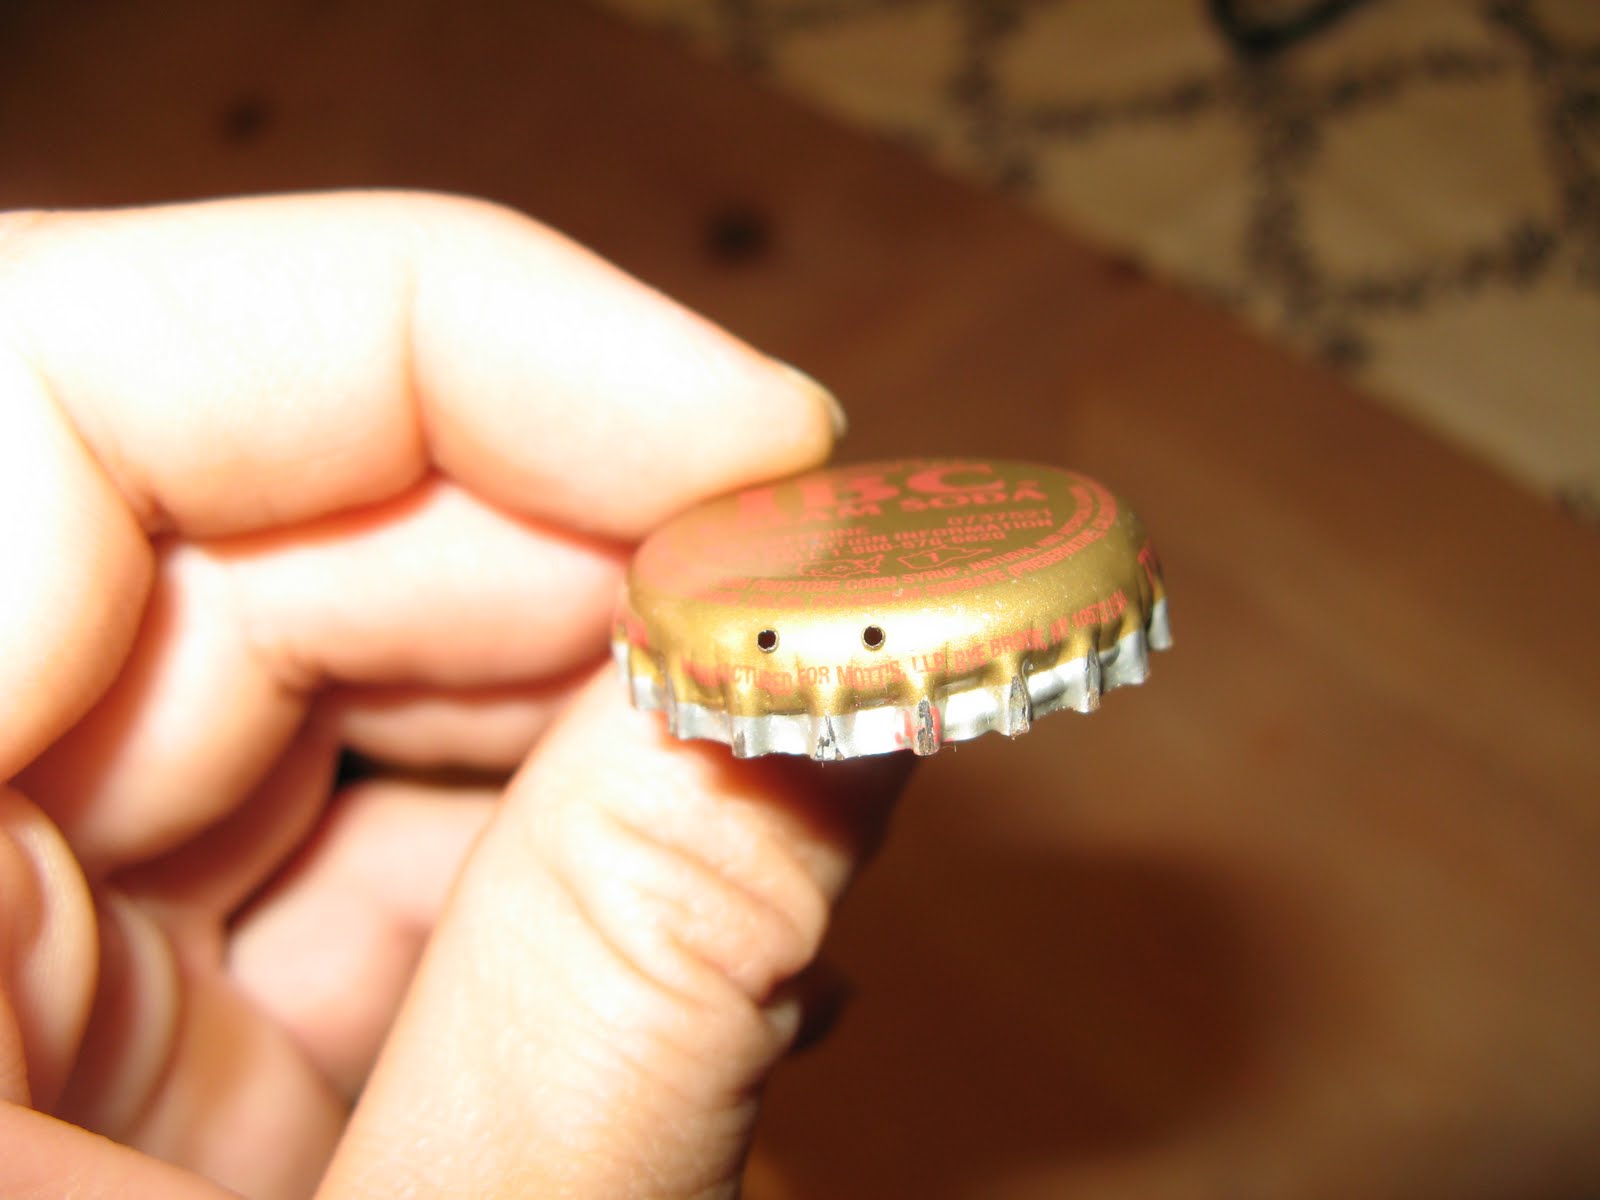
Bottle Cap Necklace Pendent

I saved a bunch of bottle caps, I knew they would come in handy one day for a craft project.
Supplies Needed:
Scrap Paper with small pattern
Diamond glaze or clear glaze
Bottle caps Cleaned
Large Jump rings
Pointed end dagger
needle nose pliers
Glue

First you will need to make two holes about 1/4 inch apart on your bottle cap, using the pointed end dagger, I got this from a eyelet kit from Making Memories
Now you will need to spread apart your jump ring with your needle nose pliers so the ends fit into the holes you made on the bottle cap.

With the needle nose pliers close the jump ring

Now you will need to cut a small circle out of your paper. Pick part of the paper you want to have shown on your necklace. I traced around the bottle cap then cut a little smaller then the traced circle. The circle doesn't need to be perfect, jut enough to cover the majority of the inside circle of the bottle cap.

Glue your circle in with glue, then glaze the top of the paper with the diamond or paper glaze.

Let it dry and there you go a recycled necklace pendent.You can dress it up with beads, string, chain. I would love to see what you do with this, make a comment and send a link to your website!
Same paper-different cards


Monday, August 16, 2010
Use pictures from an old calendar
I had one of those little desk calendars that had cute pictures on it with a little quote each month. I decided to cut up the calendar and make it into cards. I cut out the picture and made a frame for it and used my scalloped scrap booking scissors to cut around it. The strip of flowers was the bottom border of the calendar. Then I cut some paper flowers out of some crinkle paper and used some brads that I had on hand. To make the bottom of the card I used my scalloped scissors and then my two different sized hole punches to create a pattern. I chalked the bottom of it with my red ink pad so it would show up against the back of the card when folded and I also chalked the edges of the card to create a border all the way around.


Thursday, August 12, 2010
Use the same paper for four cards

I loved this paper and thought it would be fun to make multiple cards out of it.
Here's what you need to make these four cute cards:
3 8x10 sheets of white/
off-white paper
off-white paper
2 8x10 sheets of a cute flowered
print
small piece of plain paper in a
corresponding color
1 or 2 colors of thin ribbon
5 large brads and 3 small brads
optional: 3 small flowers
5 large brads and 3 small brads
optional: 3 small flowers
3 different stamps*
*If you don't have stamps then you can print the words off of your computer on the white paper before you cut it into the one inch strips discussed below.

For this card, cut the flowered print to the size of the front of the card and glue on. Take a one inch strip of white and cut it to the length of the card. The easiest way I found to attach the ribbon is to wrap it around the edge and tape it. If it's not laying flat on the front, use a small glue dot to secure it. To save money we cut the flowers out of the paper and then insert a large brad into the centers. Arrange the flowers how you want and glue them on.

For this card, tear the edges of about a 2 1/2 inch strip of white and then cut a once inch strip of the flower print to go on top of it. Stamp Happy Birthday on one of the one inch white strips and cut it smaller. I had these three flowers that matched the paper, but you could just cut out three of the smaller flowers from the paper and use them with the small brads in the middle. Arrange how you want and glue on. A glue dot works well for the flowers.

For this card, use the small piece of the plain corresponding paper and cut a 2 1/2 inch strip. Cut a two inch strip of the flowered print and rip the top and bottom edge. Stamp Thinking of You on the one inch white strip and tape the ribbon along the bottom of it. Cut out a flower and insert a large brad in it and glue it all on.

For this one, cut the flowered print to the size of the front of the card. Stamp "Thank You" on the one inch white strip and tape on the ribbon at the bottom. Cut out a large flower and a small flower from the paper and hold them together with a large brad and glue it all on.
And now you have four cute, easy cards without having to spend very much!
Tuesday, August 3, 2010
Gift Box
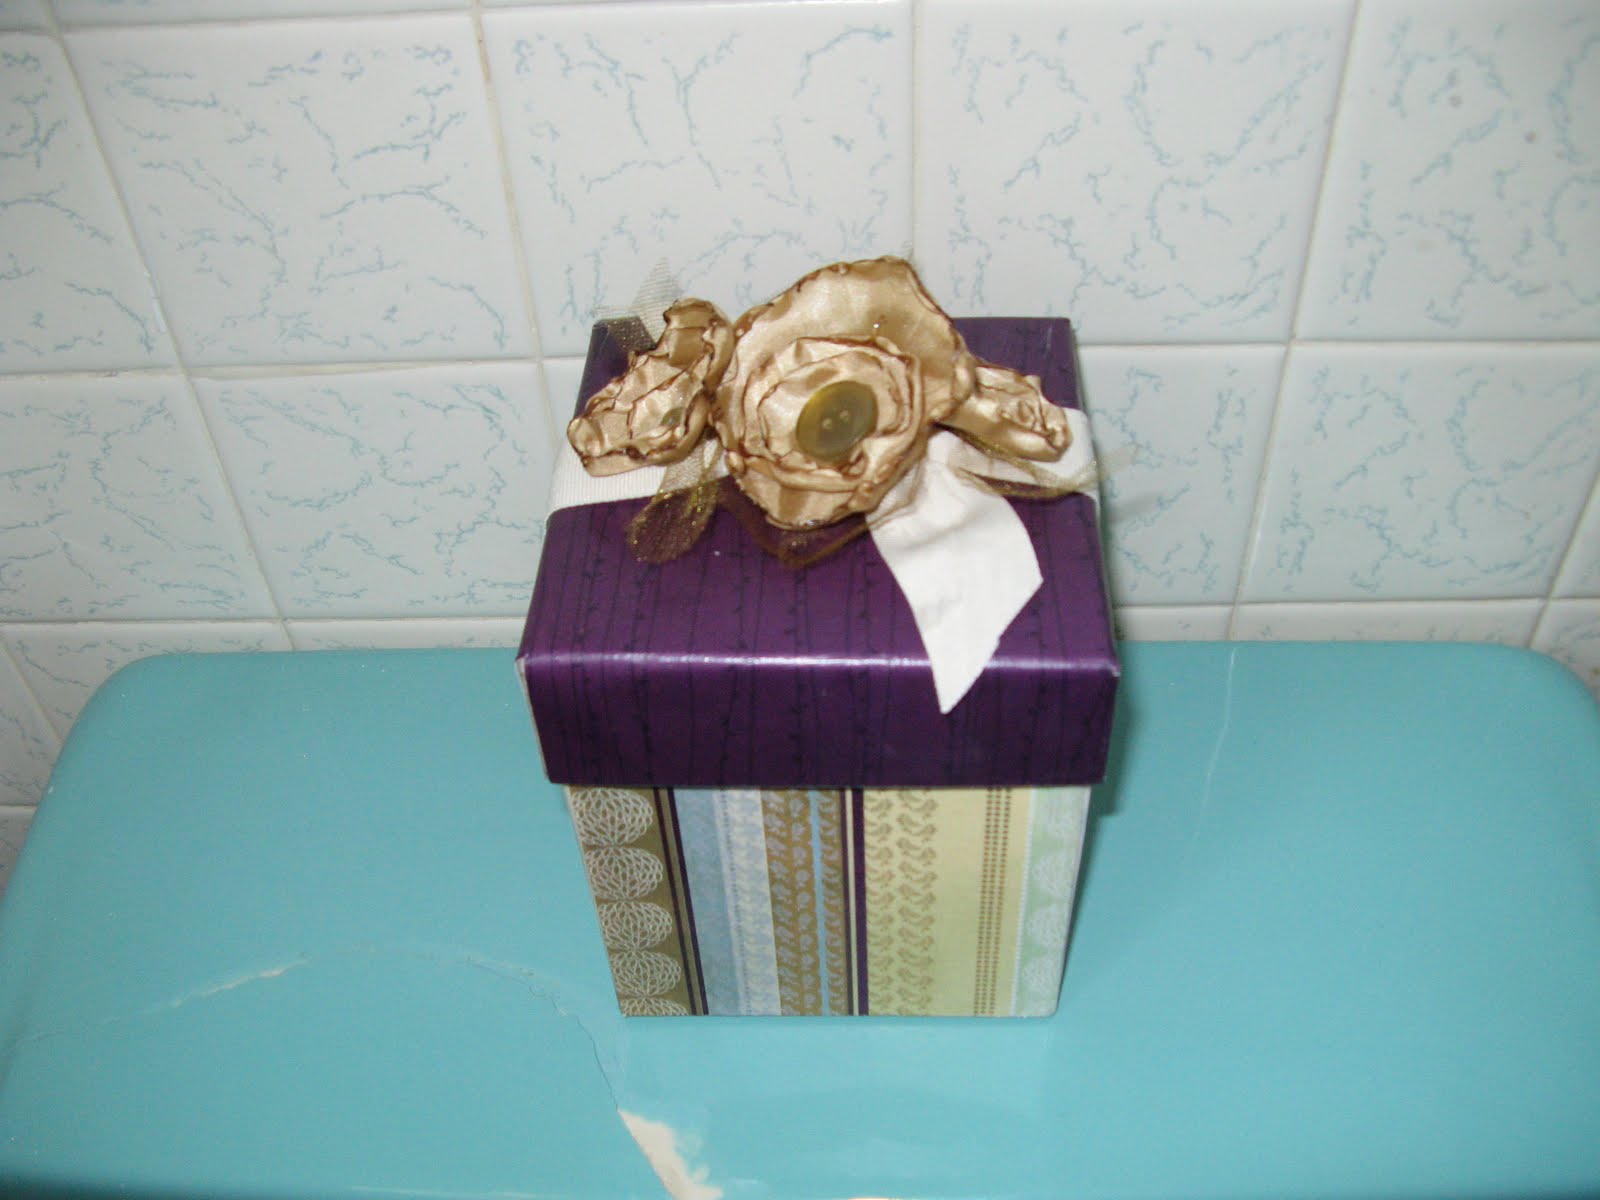
I was looking for something cute to go in my bathroom to place toilette paper in, I saw these boxes and my creative juices started flowing. These can be used as a decoration or as a box to give a gift in

Supplies needed:
A box ( you can get these in all different sizes at Ross or TJ Max)
Mod Podge
Paint brush
Scrapbook paper
ruler
pencil
glue gun and glue sticks
For Flower top:
Ribbon
1/4 yard satin lining
scrap of tulle
matches
scissors
buttons

. Lets start with the lid. first I place the lid on the paper. You will need to measure the height of the lid and add 1/2 inch for the fold over. Once you have your measurement make sure there is that much of the paper on the outside of you box, like shown in the picture.
Now you I cut the corners out and folded the edges to go over the box. Where the extra 1/2 inch is you will need to cut out the corner.
Next I put mod podge in the middle of the paper, placed the lid on the paper and I held it down smoothing the paper down so there weren't any bubbles. Then I glued the sides down one at a time holding each in place and smoothing out bubbles. When it was all dry I mod podged the outside of the box lid. On the inside added the ribbon. I cut out tow pieces the same size. Glue gunned them onto opposite sides.

I tied the ribbon in a double knot, the on the opposite side tied a piece of tulle.

To make the flowers I went to this site here:
I used buttons for the center of my flowers.
The box:
I measured the length and height of my box on it's side. Then I added 1/2 an inch on the height for the fold over on the top of the box. I used two coordinating pieces of paper and cut out two sides of the box per paper. So in all I had four cut out pieces of paper for all four sides of the box. I folded the extra 1/2 inch of the paper on the inside of the box, making sure my paper also covered the bottom of the box. Then I cut the corners of the inside fold.
I used mod podge to glue on the paper to each side of the box. (Make sure you do one at a time and use your hands to smooth out any bubbles. After each side is dry I mod podged the outside paper of the box
And there you have it an adorable box . I also did the same thing on a bigger box but used Halloween paper. On the top I put a big orange bow.
My own Jar lantern
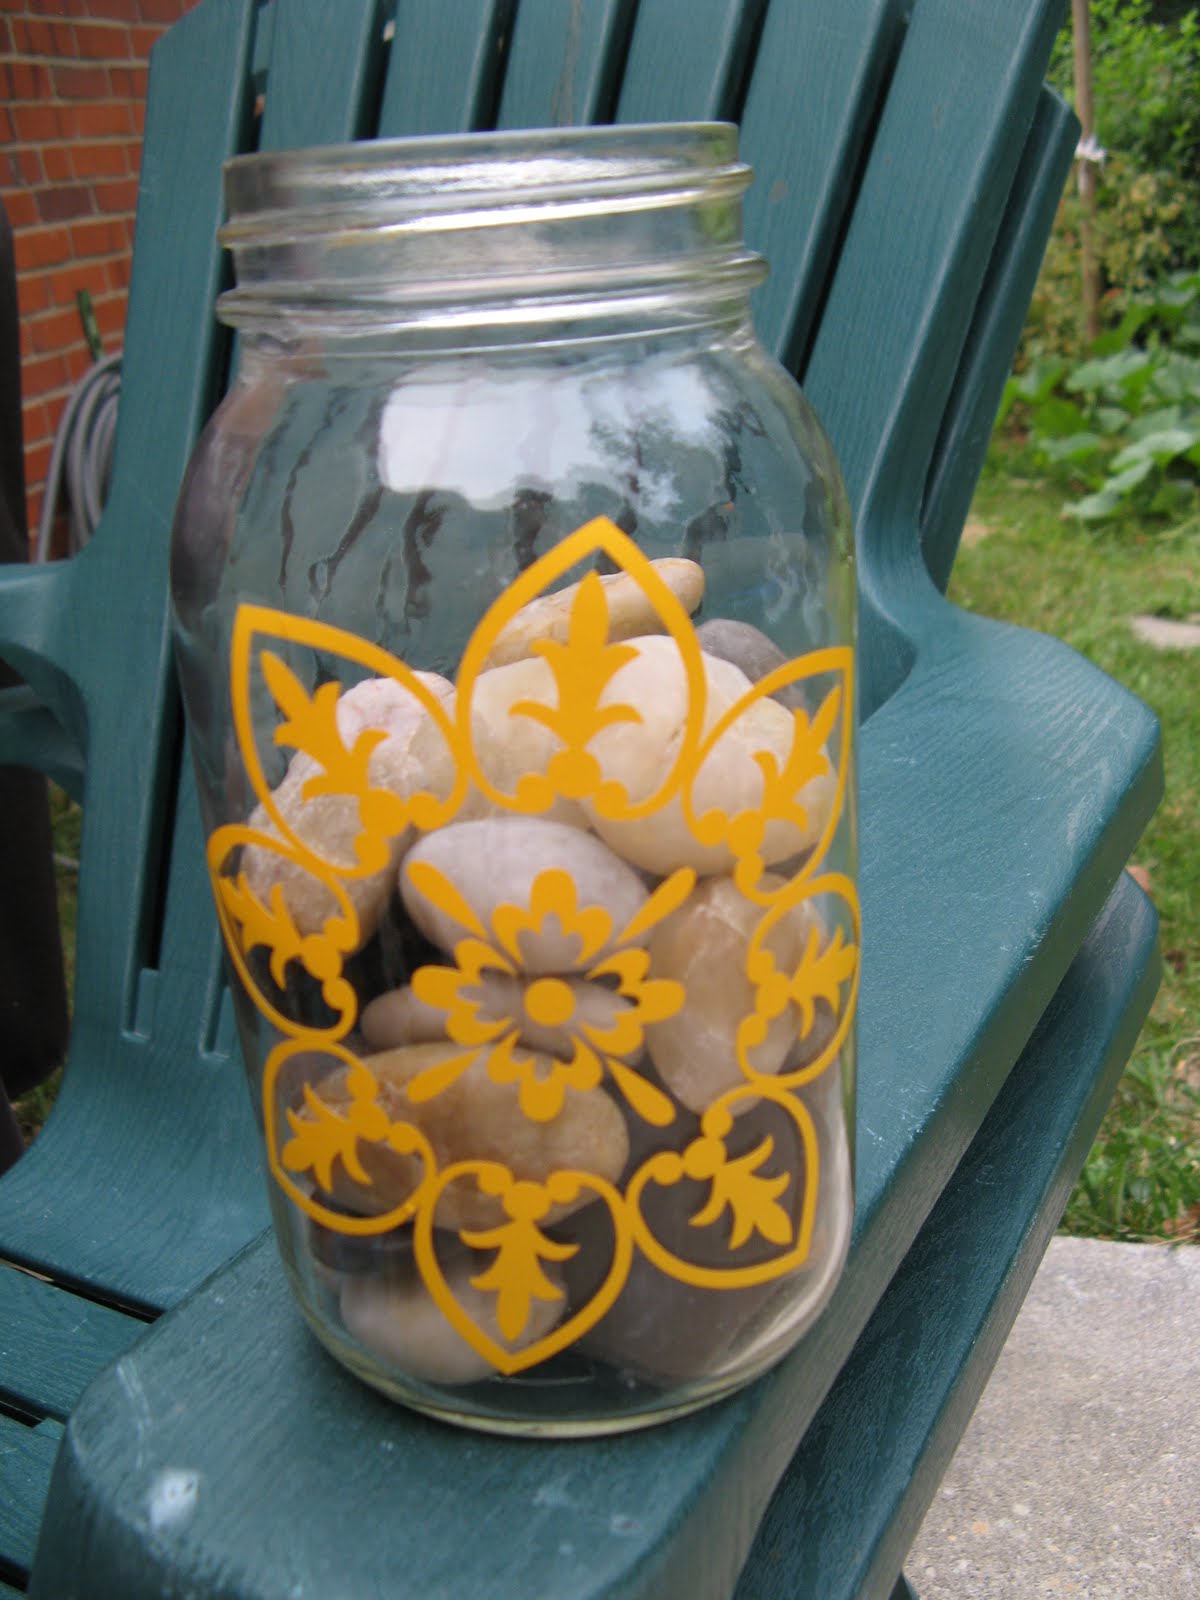 |
I used my Silhouette machine to cut out this design on vinyl. Then I placed the vinyl on my jar. |
 |
| Dip the Jar in etching cream, I used etch bath dipping solution you can buy it here: |

After I cleaned the solution off my jar I twisted some wire around it. I used a bronze color of wire that I picked up from Michael's. I used a pencil to twist the ends. Then I added gold rhinestones (these were also from Michael's in their dollar section). In the bottom of the jar I placed sand and pink marbles.
I have seen so many different versions of this jar, some people put glass beads around the wire, others paint on them. They're really cheap to make and so cute to display. They are also great as table toppers for outdoor dinners and parties.
Subscribe to:
Posts (Atom)