Welcome to our Craft blog. We offer an assortment of homemade cards and crafts that are great for decorations, gifts, holidays and other various activities. Thank you for visiting and be sure to come back every Monday and Thursday to see our new ideas. Enjoy your stay!

Tuesday, December 21, 2010

Hands Soap Bottles

It's probably my turn to post, since no one posted on Monday. Sorry. I have the hardest time keeping track of this extra item in my life. But I have two weeks off teaching for Christmas and actually have time to post. I love Christmas break.

So here is my Christmas or anytime craft for the week. It is super easy and cheap. My two favorite things when I'm making a craft.

You will need:
a bottle of soap (get the $1 Equate kind from Walmart)
transparency with hands saying printed on it
netting or ribbon
gift tags
rubbing alcohol or fingernail polish remover
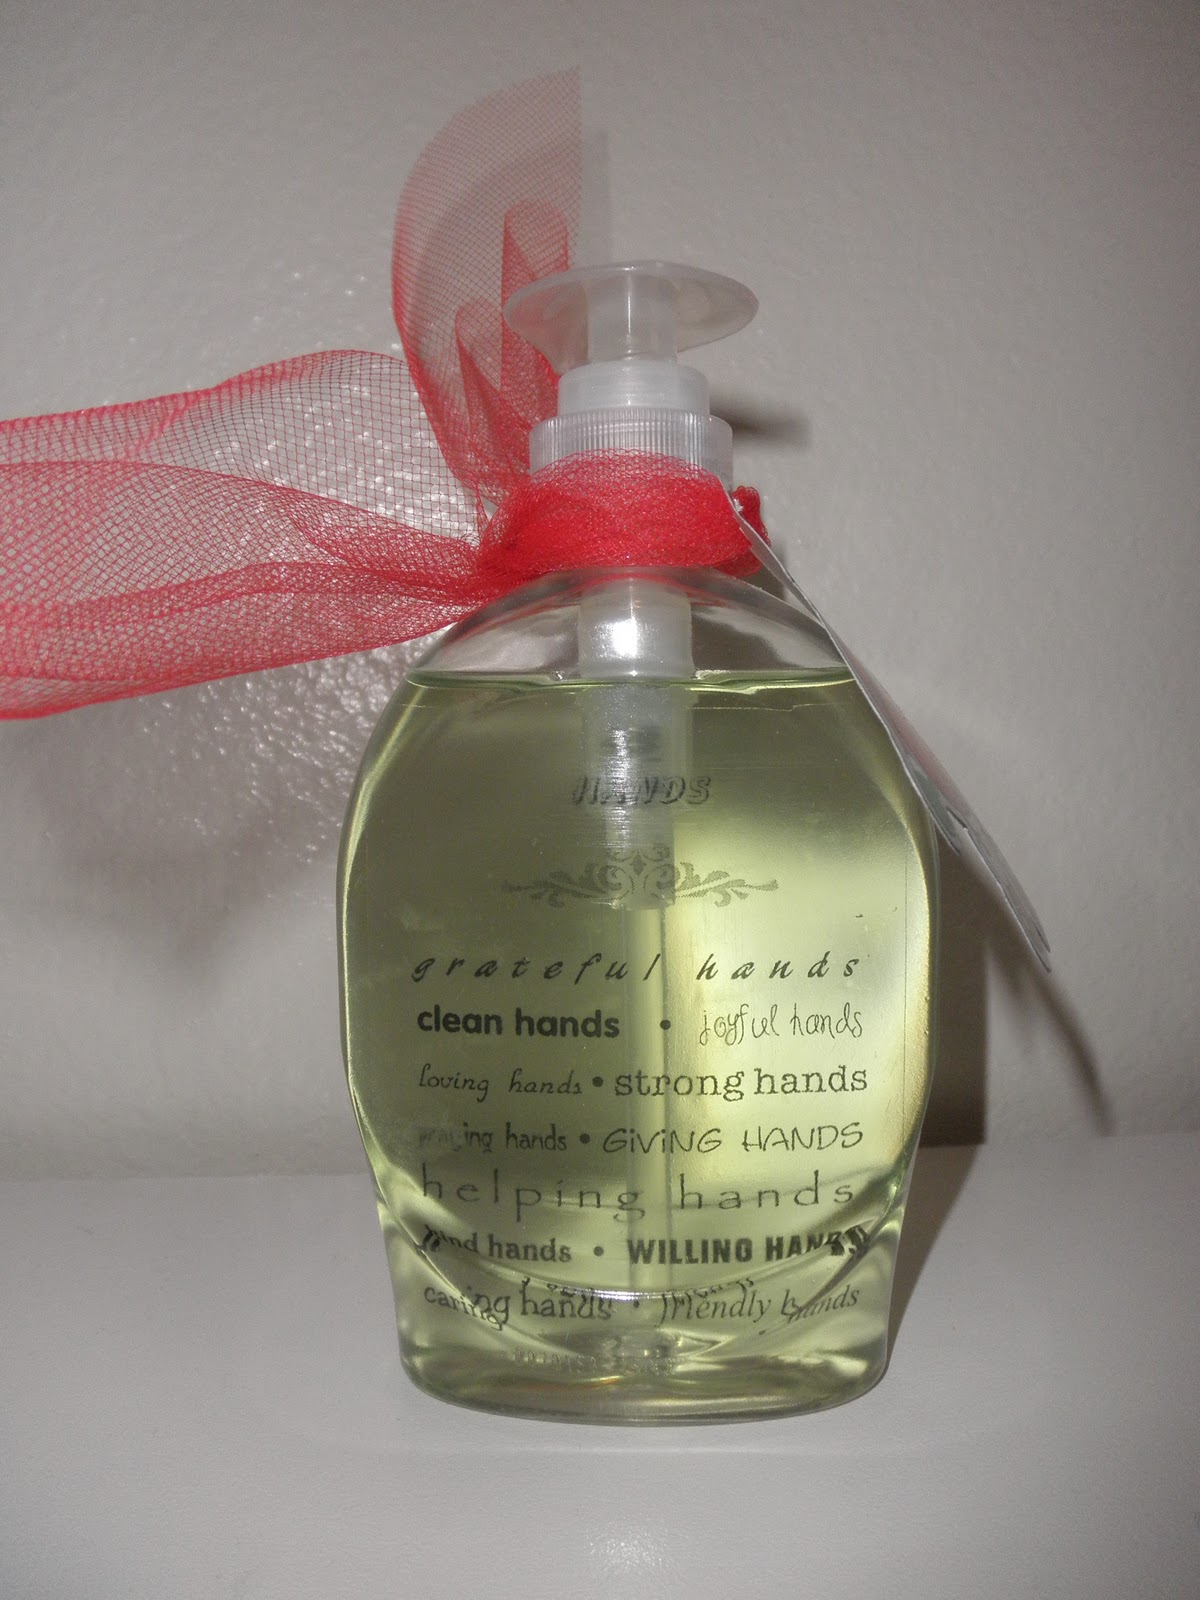
First download a copy of the hands saying, then using your own printer or your local copy store print it onto a transparency. Cut apart the hands saying. Remove the labels from the soap bottle (Equate soap is the cheapest and easiest to remove the labels, Softsoap brand labels are hard to get off). Use the rubbing alcohol (works best) to remove and residue from the label. Then unscrew the lid of the soap bottle. Loosely roll the hands saying up (just small enough to fit in the soap bottle opening), it works better if you roll it back with the saying on the front. Then put the saying in the soap bottle. Use the soap dispenser to push it down a little and help it unroll. Be careful not to push it all the way down to the bottom. Screw the lid back on. Then tie the netting or ribbon around the top, attach a gift tag if you want, and viola a finished gift. You can use red and green colors for Christmas or other colors for birthday gifts.

Here is the download link for the Hands saying.
http://www.4shared.com/file/W0atSoFK/HANDS1.html

Monday, December 13, 2010

An Extra post

I got back from a cruise last week, and posted my Monday post but forgot my Thursday one. I am so sorry, so here is my post a couple of days late!
I made these Dashing through the Snow plagues for gifts. There were easy and fun to do. All you need is three pieces of wood that can be any size. (if you have some scraps they would work well) My wood was 4x4 and 3x4. 1/2 inch thick.
I painted the edge and backsides along with the top sides of the wood pieces
You can use any color you want that looks good with your paper

I cut my paper to be a little smaller then my wood. I then modge Podge the paper onto the wood

I cut these shapes using my Silhouette. And I cut the words Let It Snow in a different vinyl color then my images. If you do not have a vinyl machine you can always print an image onto the paper using your printer, or use some big stickers from the craft store.

There you go a gift for the neighbors or a decoration for yourself.

Holiday Magnets

These cute magnets are so easy to make and make great gifts for your neighbors!  Buy a bag of the 1 inch clear glass marbles, the flat ones that usually go in vases, not the round ones.  Then cut out circles of scrapbook paper to fit the marbles.  I glued on a star and snowflake and printed joy on some of them.  Then mod podge the paper to the flat part of the marble.  When it's dry either hot glue a magnet to the back or buy the little round ones that have the sticky back.  I used the stick on ones, and they are holding just fine.  I plan on buying the silver canning lids (not the rings, but the lids themselves) and putting a circle of scrapbook paper on the inside of it and then putting the magnets on it and then put them in a little cellophane gift bag with some shredded paper stuff.  That way the magnets stick to the lid and don't get lost in the bag.  Have fun creating!

Monday, December 6, 2010

Count down to christmas

I am a firm believer in good deals, especially in crafts. Last year I found this wood advent calendar on clearance at Michaels. I don't have an advent calendar, so this is what I did to spruce this up:
First I spray painted the entire advent calendar (spray painting was easier then painting it with acrylics)

 I used my printer to print the numbers on the scrapbook paper

Thursday, November 18, 2010

Pumpkin Bars

I found the yummiest recipe for Pumpkin Bars!  Enjoy!

1 package yellow cake mix
1/2 cup melted butter
1 egg
Combine and press into a greased 9x13 pan, reserving one cup for topping.

Step 2
3 cups pumpkin pie mix (be sure to by the mix and not plain pumpkin)
2 eggs
2/3 cup evaporated milk
Mix until smooth and pour over crust.

Step 3
1 cup cake mixture
1/3 cup sugar
1 tsp cinnamon
Combine and sprinkle over filling. (It says to keep adding sugar until it crumbles, but it seems like I can never get to that point, so I just pull it into pieces and distribute them on top of the filling)

Bake at 350 degrees for 50-55 minutes until the pumpkin layer is done.  An easy way to tell if the pumpkin is done is to insert a knife and when it comes out almost clean, its done.  We like it best refrigerated and served with cool whip. 

Little Turkeys

 So I saw this cute idea for little edible turkeys to put by the side of everyone's plate at Thanksgiving, and they look cute in real life, but the camera just couldn't quite capture it.  The body is a creme filled chocolate or a chocolate covered cherry, the tail feathers are half of a fudge striped cookie and the head is a candy corn, with chocolate frosting holding it together. I think if you use a chocolate covered cherry, the body will be bigger and would be cute if you used a whole cookie as the tail feathers and another cookie underneath it kind of as feet.  Yum!

Monday, November 15, 2010

Give Thanks


This cute holiday plaque was so easy to make.  Here is what you'll need:

12x12 Board (I got mine at Roberts for $3)
12x12 scrapbook paper
vinyl saying
embellishments
mod podge/foam brush
sand paper

I first painted the wood a dark brown and then I mod podged the green paper to the wood.  Don't trim the paper to size, leave just a little edge of the paper (atleast an 1/8 of an inch) hanging over the edge of the wood (the board says its 12x12, but it was really only 11 3/4 square).  Then using the sandpaper, sand the edges of the paper off by sanding along the edge of the board and the excess paper will come off in a nice little strip and then your paper will fit your board exactly.  I chose to rough up the corners and a few spots on the front of the paper with the sandpaper to give it more of a worn look.


Next I put on the vinyl letters and I cut leaves out of a piece of scrapbook paper and glued those on.  Then I mod podged over the top of everything. 


 Last of all, I added ribbon (using glue dots) and a little jewel where the ribbon crossed over itself to get the finished product and voila! A super easy decoration!