Welcome to our Craft blog. We offer an assortment of homemade cards and crafts that are great for decorations, gifts, holidays and other various activities. Thank you for visiting and be sure to come back every Monday and Thursday to see our new ideas. Enjoy your stay!
Showing posts with label Gifts. Show all posts

Friday, February 4, 2011

Flowers for hair, crafts, etc.

I just learned how to make the cutest flowers to put in your hair, or on a hat, or a purse, or wherever you want.  Here's what you'll need:   
                                 Solid fabric (8"x 8" square is enough fabric for one flower and I like to 
                                                     use a  shimmery / satiny type fabric)
                                 Sheer fabric/netting that corresponds/matches the solid 
                                                     (5"x 5" square is enough sheer for one flower)
                                 beads or a button for the middle
                                 needle and thread
                                 1" by 2" rectangle of felt 
                                 hair barrette
                                 candle
                                 hot glue gun

Okay, first cut out of all your circles* according to the following measurements (you can make smaller flowers by leaving off the biggest circles):
 
4" circle - solid fabric            (you can cut out the layers however you want....more
3 1/2 " circle - solid fabric        or less sheer depending on how full you want the flower)
3" circle - solid and sheer fabric
2 1/2" circle - sheer fabric
2" circle - solid fabric
1 1/2" circle - solid and sheer fabric

*It's probably easiest to just get a piece of paper and draw your circles on it and then cut them out and use them as a pattern.  Then it's easy to see if you can fit the circles on to scraps of fabric that you already have. :)

Now comes the fun part.....burning the edges.  The type of fabric you have will determine how fast it burns, so I would practice on a scrap of fabric first. You can burn the edges of the sheer fabric like I did in the example above, but if you use netting instead of sheer, DO NOT BURN THE NETTING!  It will disintegrate and burn your fingers, because it burns so fast.  You don't have to hold the fabric directly in the flame, the heat about 1/4" to 1/2" above the flame is hot enough to curl the edge of your fabric.  Don't worry about getting it perfect, the different amounts that it curls is what adds to the character of the flower.  

After you've burned all of your pieces, layer them up in size order.  Sometimes I burned a piece so much that it turned out smaller than I thought it would so it fit in a different order than originally planned, but it doesn't really matter, you can layer as much or as little as you want.  You can have the sheer between every layer of solid, or only add two layers.  With the netting, since you don't burn the edges of it, it adds a different look that is cute, and it's kind of fun if you don't line it up exactly with the other layers, so that the netting sticks out here and there.

Take your needle and thread and do two or three stitches through all of the layers to hook your flower together and then sew your beads in the middle, going through all of the layers to further secure the layers.  If you're putting the flower on a bag or something, then you're done!  But if you want to make it into a barrett for your hair, or to clip on to a head band or a hat, then do this last step. 


Cut out the felt to be just slightly bigger than your barrette and sew the felt onto the barrette on each end as shown in the picture.  Then hot glue the felt to the back of your flower. These flowers may sound complicated, but they go together really fast and look adorable!  Have fun!


Tuesday, December 21, 2010

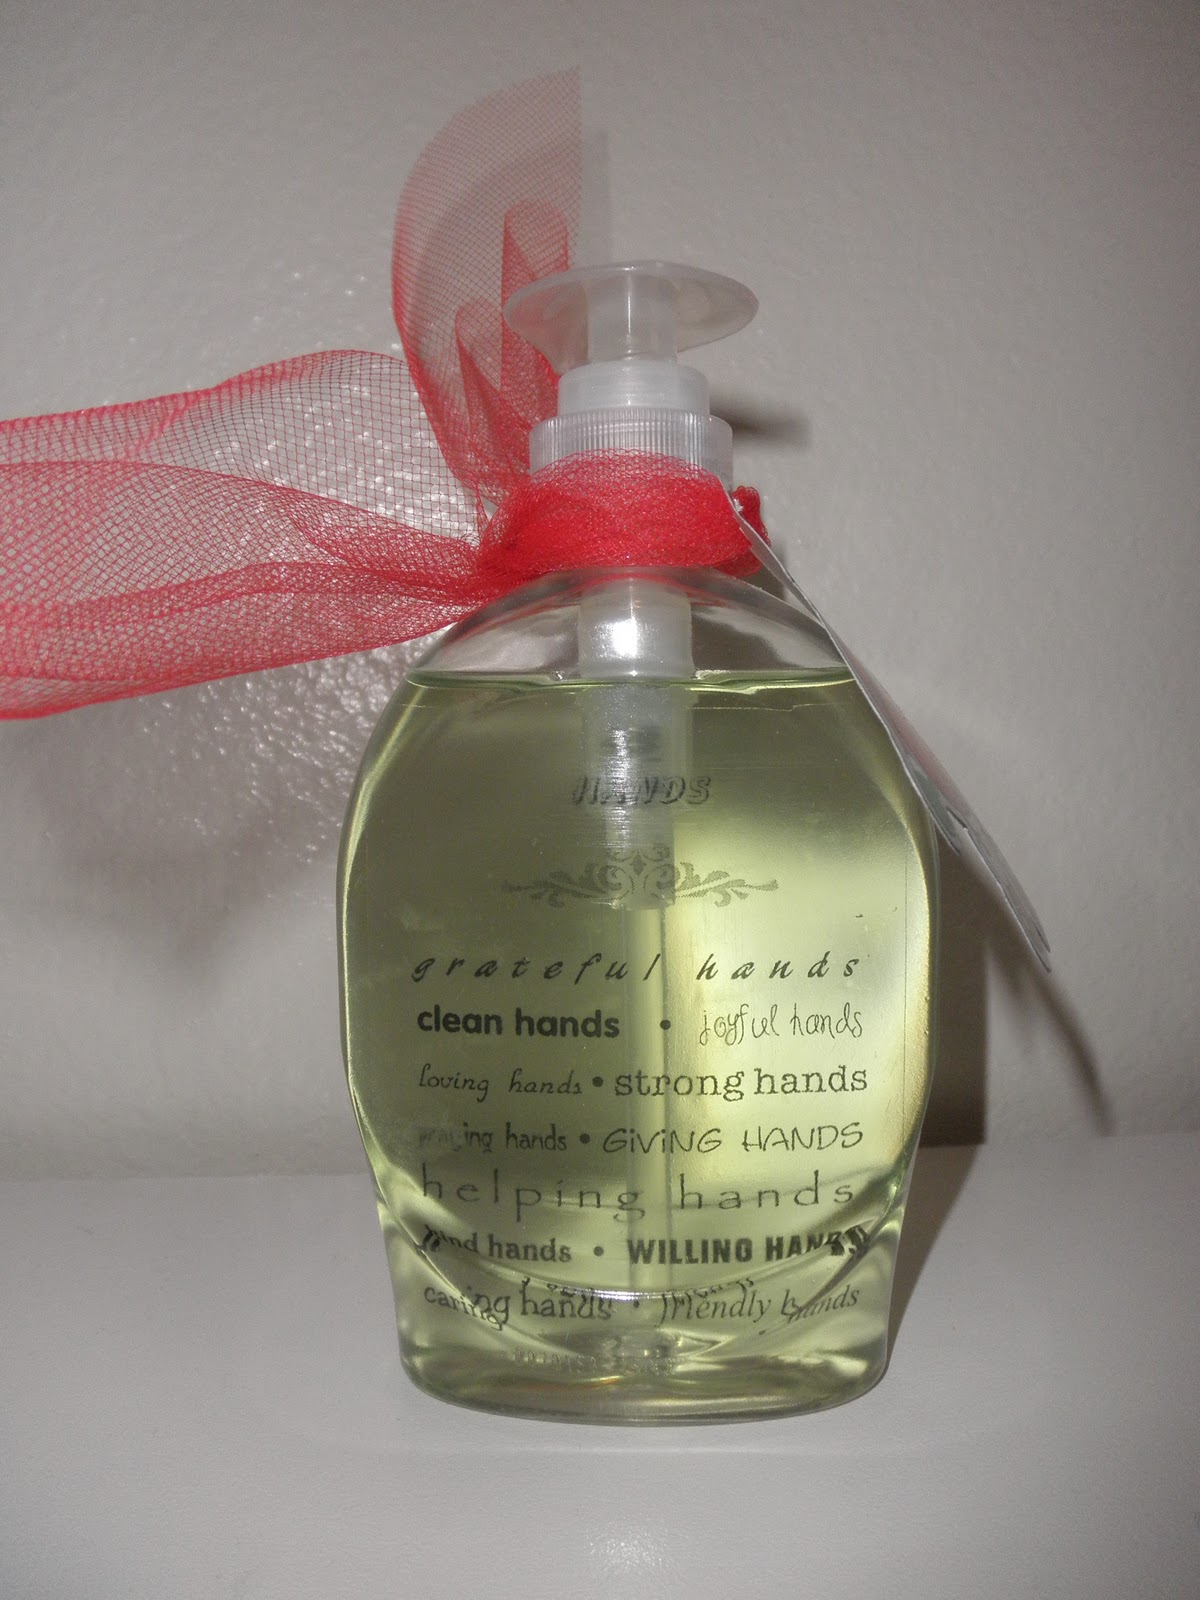
Hands Soap Bottles

It's probably my turn to post, since no one posted on Monday. Sorry. I have the hardest time keeping track of this extra item in my life. But I have two weeks off teaching for Christmas and actually have time to post. I love Christmas break.

So here is my Christmas or anytime craft for the week. It is super easy and cheap. My two favorite things when I'm making a craft.

You will need:
a bottle of soap (get the $1 Equate kind from Walmart)
transparency with hands saying printed on it
netting or ribbon
gift tags
rubbing alcohol or fingernail polish remover

First download a copy of the hands saying, then using your own printer or your local copy store print it onto a transparency. Cut apart the hands saying. Remove the labels from the soap bottle (Equate soap is the cheapest and easiest to remove the labels, Softsoap brand labels are hard to get off). Use the rubbing alcohol (works best) to remove and residue from the label. Then unscrew the lid of the soap bottle. Loosely roll the hands saying up (just small enough to fit in the soap bottle opening), it works better if you roll it back with the saying on the front. Then put the saying in the soap bottle. Use the soap dispenser to push it down a little and help it unroll. Be careful not to push it all the way down to the bottom. Screw the lid back on. Then tie the netting or ribbon around the top, attach a gift tag if you want, and viola a finished gift. You can use red and green colors for Christmas or other colors for birthday gifts.

Here is the download link for the Hands saying.
http://www.4shared.com/file/W0atSoFK/HANDS1.html

Monday, December 13, 2010

An Extra post

I got back from a cruise last week, and posted my Monday post but forgot my Thursday one. I am so sorry, so here is my post a couple of days late!
I made these Dashing through the Snow plagues for gifts. There were easy and fun to do. All you need is three pieces of wood that can be any size. (if you have some scraps they would work well) My wood was 4x4 and 3x4. 1/2 inch thick.
I painted the edge and backsides along with the top sides of the wood pieces
You can use any color you want that looks good with your paper

I cut my paper to be a little smaller then my wood. I then modge Podge the paper onto the wood

I cut these shapes using my Silhouette. And I cut the words Let It Snow in a different vinyl color then my images. If you do not have a vinyl machine you can always print an image onto the paper using your printer, or use some big stickers from the craft store.

There you go a gift for the neighbors or a decoration for yourself.

Holiday Magnets

These cute magnets are so easy to make and make great gifts for your neighbors!  Buy a bag of the 1 inch clear glass marbles, the flat ones that usually go in vases, not the round ones.  Then cut out circles of scrapbook paper to fit the marbles.  I glued on a star and snowflake and printed joy on some of them.  Then mod podge the paper to the flat part of the marble.  When it's dry either hot glue a magnet to the back or buy the little round ones that have the sticky back.  I used the stick on ones, and they are holding just fine.  I plan on buying the silver canning lids (not the rings, but the lids themselves) and putting a circle of scrapbook paper on the inside of it and then putting the magnets on it and then put them in a little cellophane gift bag with some shredded paper stuff.  That way the magnets stick to the lid and don't get lost in the bag.  Have fun creating!

Monday, November 15, 2010

Give Thanks


This cute holiday plaque was so easy to make.  Here is what you'll need:

12x12 Board (I got mine at Roberts for $3)
12x12 scrapbook paper
vinyl saying
embellishments
mod podge/foam brush
sand paper

I first painted the wood a dark brown and then I mod podged the green paper to the wood.  Don't trim the paper to size, leave just a little edge of the paper (atleast an 1/8 of an inch) hanging over the edge of the wood (the board says its 12x12, but it was really only 11 3/4 square).  Then using the sandpaper, sand the edges of the paper off by sanding along the edge of the board and the excess paper will come off in a nice little strip and then your paper will fit your board exactly.  I chose to rough up the corners and a few spots on the front of the paper with the sandpaper to give it more of a worn look.


Next I put on the vinyl letters and I cut leaves out of a piece of scrapbook paper and glued those on.  Then I mod podged over the top of everything. 


 Last of all, I added ribbon (using glue dots) and a little jewel where the ribbon crossed over itself to get the finished product and voila! A super easy decoration!


Monday, October 18, 2010

Halloween Trick or Treat Bags

So we as sisters definitely got some of our craftiness from our mom, who made these cute Trick or Treat bags for all of our kids this year, and in less than an hour you can make one too!


This is what you’ll need: 1/2 yard of a Halloween print fabric
                                     1/2 yard fabric for lining
                                     1/8 yard Halloween print fabric for top edge
                                     2 feet (2/3 yard) 1 inch nylon strap for handles
                                     Thread
  (This amount of fabric will make two bags, so if you want them to be different from each other, buy 2 different Halloween prints and alternate using use one for the lining and the other for the bag. You will need 4 feet of nylon strap for 2 bags)

First cut your fabric to these sizes: Bag – 15 ½ by 22 inches
                                                       Lining – 15 ½ by 22 inches
                                                       Top edge – 2 ¼ by 22 inches
                                                        Straps – 12 inches each
Now to put it together!!!!


Step 1 - Top decorative edge: This strip is going to go over the top two inches of the bag itself to reinforce the top.  Measure 2 inches down from the top of the bag material and pin the top edge strip there with the right sides together.  Sew ¼ inch from top edge of strip. (In this picture, the strip is the candy corn print)


Then turn strip up and sew along the top edge to secure it.  (If it doesn’t quite reach the top, don’t worry! Just sew ¼ inch from the edge of strip. When you sew your top seam, just make it wide enough to cover your stitching.)


Step 2- Sew bag : Fold bag material so it measures 11 by 15 ½ inches. Sew down the side, sewing ½ inch seam (unless you have words printed down the selvage side – then make the seam wide enough that the words will be inside the bag). Turn at the bottom of the bag and sew along the bottom edge. Backstitch each end as you sew.

 
Step 3- Bottom of bag: This is easier than it looks! Stick your hand inside the bag and open up the bottom of the bag. Find a corner and match up bottom seam with side of bag making sure it is pulled tight with no fabric bunched up on the back. Measure 2 inches across as in picture. Sew and backstitch. Repeat on other corner.


Step 4 – Handles: Turn bag right side out and lay so top is flat. Measure over 2 ½ inches from sides. Pin straps (with one on each side of bag) placing them at the 2 ½ inch mark, with about 4 inches between edge of straps. Zig zag edges of straps to prevent fraying. Trim thread.

 
  Step 5 – Lining of bag: Sew as you did the bag in steps 2 and 3 above – EXCEPT
in the side seam leave about 4 inches not sewn about ½ way down the lining.
Step 6 – Put bag together: This sounds tricky but is really easy! Leave lining turned with the print inside. Put the bag inside the lining with right sides together and matching up the side seam. Pin the tops together. Now sew the two pieces together – when you get to a handle, backstitch across the handle so you sew across the top of it 3 times to make them stronger. When you have sewn the tops all the way together back stitch. Now put your hand through the opening you left in the side seam of the lining and pull the bag out! 


Step 7 – Sew lining opening closed:  On the inside of the lining sew the opening closed with a really narrow seam. Then stuff lining inside bag.


Step 8 – Finish top of bag: Working on the outside of the bag top stitch around the top of bag making sure lining is pulled down inside so it won’t show from the front of bag. This will keep the lining down inside and make the top of the bag stronger too!


                      NOW HAVE SOME FUN TRICK OR TREATING!!!


Thursday, September 16, 2010

Oops

I went to home depot this week and saw these 5x6 aluminum sheets. I was thinking they might be magnetic, oops they aren't, so I tried to write on it with a dry erase marker and it worked like a dry erase board. So here you go, a dry erase board fridge magnet.

Things needed:
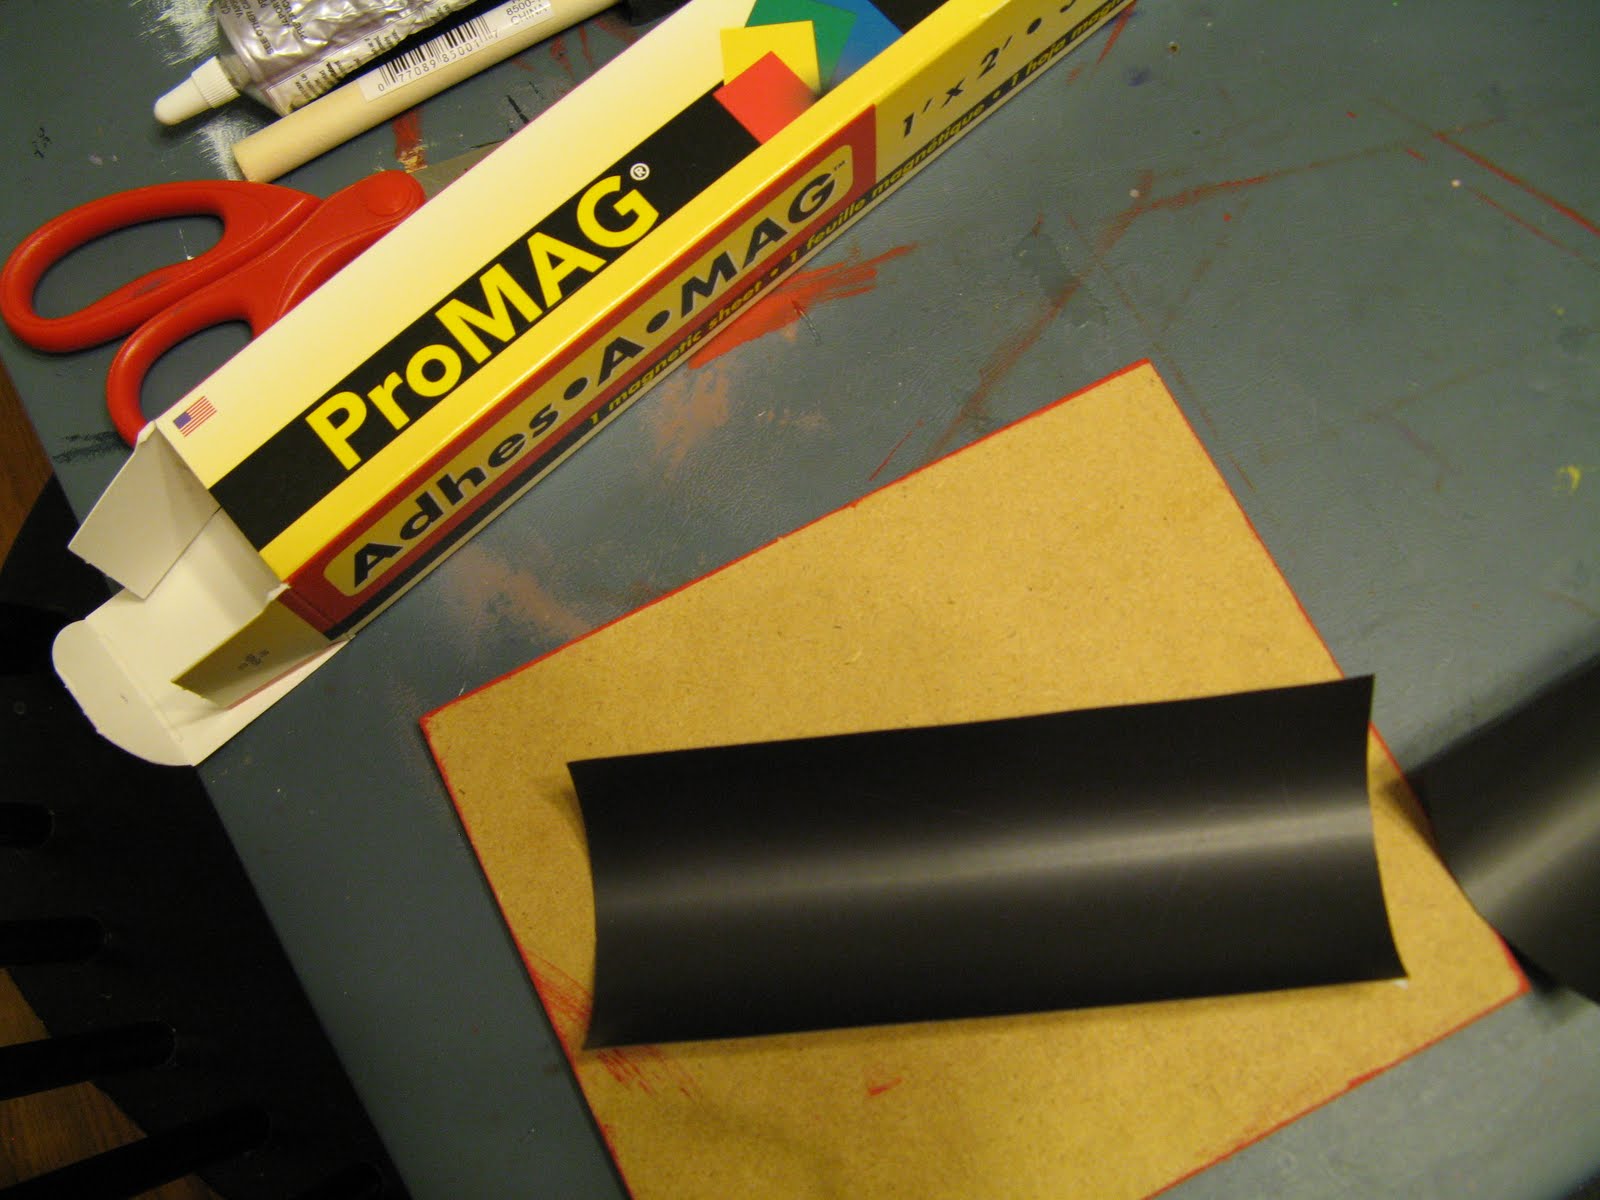
Adhesive magnetic strip ( I got this from Michaels)
Modge podge
E600 glue
1 piece of super cute scrapbook paper
acrylic paint to match your scrapbook paper
stamp ink (to ink the edges)
5x6 inch sheet of aluminum
thin piece of Ply wood cut to desired size, (I bought a bundle of wood plaques from Michaels and used one of those pieces.)
Letter stickers or vinyl saying (optional)


First you are going to cut your scrapbook paper a little smaller then your ply wood. Ink the edges of the cute paper with ink. (I like to use Brown ink)

Next paint the edges of your ply wood and sides.
When dry, glue your paper onto your wood. I used mod podge on the top and bottom of the paper.
I cut the aluminum sheet a little bit using regular scissors. Use the E600 to glue on the aluminum sheet to your board. If you want you can put a vinyl word on the top, or use letter stickers to make a word.

Cut and place the magnetic sheet so it covers most of your wood, unless you have really strong magnets, then you can use those.

There you go, a dry erase board for you fridge. You can make bigger or smaller ones, and embelish them all you want.

Halloween Door Hanger

"One Man's Junk is another Man's Treasure"

I found these pieces of wood in the dumpster of a cabinet shop. I took a couple of pieces, and came up with this Door hanging decoration. You don't have to make it a Halloween door hanger, you can use any type of paper, or ribbon for this project. The only bummer is I didn't grab more pieces!

Things needed: 
3 pieces of  1.5inch by 3/4 inch by 9 inch wood
Chain ( I used silver Jewelry chain)
Ribbon
Scrapbook paper
Acrylic Paint to match your paper for the wood
10 eye hooks
Modge podge
paint brush


First you are going to sand the edges of your wood. Then you will need to paint them the colors that match your paper
.                                            Cut your paper a little smaller then 1.5" and 9" I inked the edges of the paper in black to bring out the paper, but you don't have to do this step.
Modge podge the paper onto the wood, smooth out any crinkles, then put a layer of modpodge on top.
Then I took some black paint and I stressed the corners of the wood. (to stress the corner put a little bit of paint on a brush you don't care to have ruined. Stroke it on some paper until there is only a little bit of paint, and then take the brush and stroke the edges of the wood softly.)

I cut some vinyl words with my silhouette, however you can use different font and sizes of letter stickers from the store, or rub ons.

Next you put the eye hooks on the wood like this:
Top Piece and middle piece: on the top and bottom part of the wood place eye hooks on both the left and right sides so you will have four eye hooks on each piece.
   The bottom piece: place eye hooks on left and right sides only on the top of the wood

Disconnect the chain so you have four 2 inch strips and one 14 inch strip.
Connect the three pieces of wood by linking together the bottom piece of wood to the middle piece placing the chain ends in the eye hooks, and the middle and top piece by placing the chain on the middle top wood eye hooks, and the bottom of  the top wood piece eye hooks.

To finish the project connect the 14 inch chain to the two top wood piece eye hooks, add a bow and there you go a darling decoration to your door.

*IDEA* While making this I thought it would be cute to do one that said Friends always Welcome, or Welcome to our house. You can really do a lot of things with this craft

Monday, September 13, 2010

Ribbon Flower Bow

I really should not post another craft idea, but I really do not want to clean my house right now, so here you go. I think these hair bows are so darling on little girls. The nice thing is they are so easy to make, they take about twenty minutes, but they are so worth it.


Things needed: 
1-1.5 inch wide ribbon 3/4 -1 yard 
(if you want to have more layers use more ribbon)
Bead, or button
Sewing machine, 
Needle
Thread
Hair clip
Glue gun
First you are going to sew the a gathering stitch (this is usually a 4 or 5 stitch length)
Gather the ends so it curls
Make a circle with your ribbon, 
make another circle layer and then using your needle and thread sew the insides together, 
continue doing this with each layer,until you have no more ribbon left. 


It should look like this. Now tie off your ends. On this bow I hand stitched a bead as the center, but you could use a button or a brad.

Now you can glue it onto your hair piece. 
And there you go, a cute hair piece for you little princess! (or a friend)

Friday, August 20, 2010

Bottle Cap Necklace Pendent

I saved a bunch of bottle caps, I knew they would come in handy one day for a craft project.
Supplies Needed:
Scrap Paper with small pattern
Diamond glaze or clear glaze
Bottle caps Cleaned
Large Jump rings
Pointed end dagger
needle nose pliers
Glue
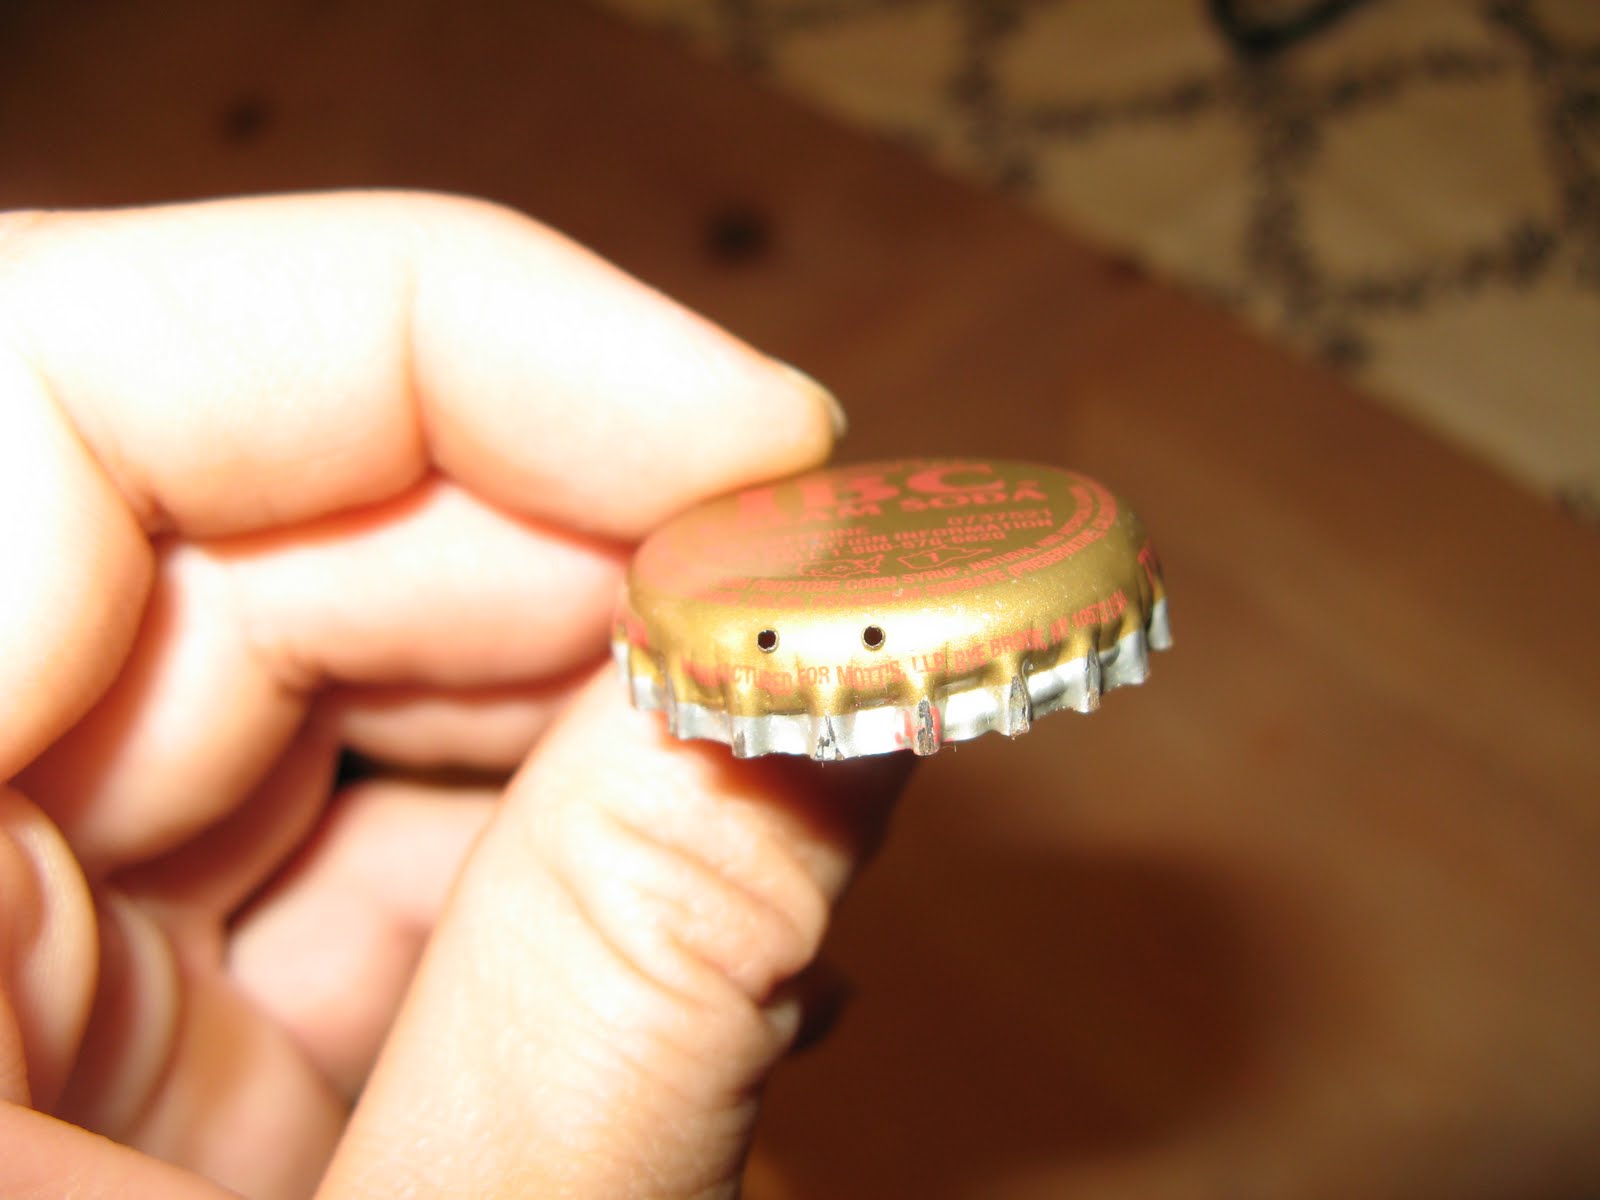
First you will need to make two holes about 1/4 inch apart on your bottle cap, using the pointed end dagger, I got this from a eyelet kit from Making Memories
Now you will need to spread apart your jump ring with your needle nose pliers so the ends fit into the holes you made on the bottle cap.
With the needle nose pliers close the jump ring
Now you will need to cut a small circle out of your paper. Pick  part of the paper you want to have shown on your necklace. I traced around the bottle cap then cut a little smaller then the traced circle. The circle doesn't need to be perfect, jut enough to cover the majority of the inside circle of the bottle cap.


Glue your circle in with glue, then glaze the top of the paper with the diamond or paper glaze.
Let it dry and there you go a recycled necklace pendent.You can dress it up with beads, string, chain. I would love to see what you do with this, make a comment and send a link to your website!

Tuesday, August 3, 2010

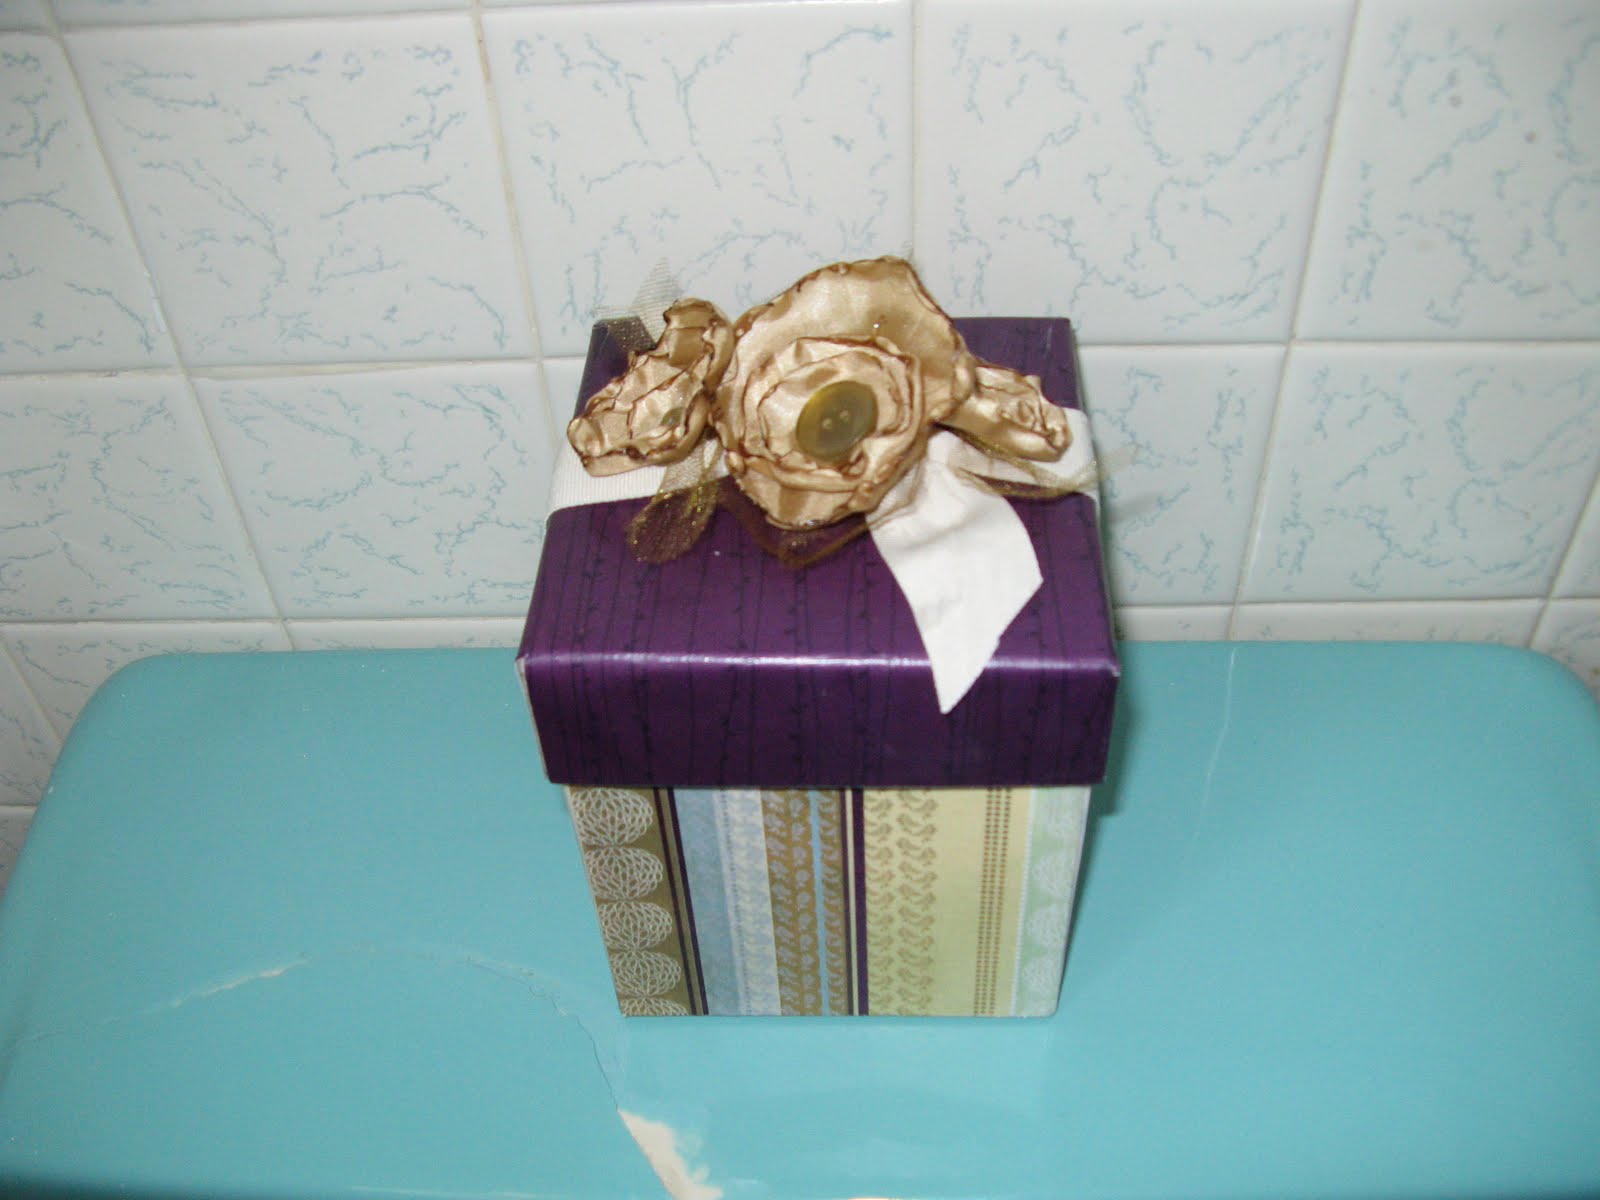
Gift Box


was looking for something cute to go in my bathroom to place toilette paper in, I saw these boxes and my creative juices started flowing. These can be used as a decoration or as a box to give a gift in

Supplies needed:
A box ( you can get these in all different sizes at Ross or TJ Max)
Mod Podge
Paint brush
Scrapbook paper
ruler
pencil
glue gun and glue sticks
For Flower top:
Ribbon
1/4 yard satin lining
scrap of tulle
matches
scissors
buttons


. Lets start with the lid. first I place the lid on the paper. You will need to measure the height of the lid and add 1/2 inch for the fold over.  Once you have your measurement make sure there is that much of the paper on the outside of you box, like shown in the picture. 
  Now you I cut the corners out and folded the edges to go over the box. Where the extra 1/2 inch is you will need to cut out the corner. 
 Next I put mod podge in the middle of the paper, placed the lid on the paper and I held it down smoothing the paper down so there weren't any bubbles. Then I glued the sides down one at a time holding each in place and smoothing out bubbles. When it was all dry I mod podged the outside of the box lid. On the inside added the ribbon. I cut out tow pieces the same size. Glue gunned them onto opposite sides. 


I tied the ribbon in a double knot, the on the opposite side tied a piece of tulle.

To make the flowers I went to this site here: 
I used buttons for the center of my flowers.

The box:
I measured the length and height of my box on it's side. Then I added 1/2 an inch on the height for the fold over on the top of the box.  I used two coordinating pieces of paper and cut out two sides of the box per paper. So in all I had four cut out pieces of paper for all four sides of the box. I folded the extra 1/2 inch of the paper on the inside of the box, making sure my paper also covered the bottom of the box. Then I cut the corners of the inside fold.
   I used mod podge to glue on the paper to each side of the box. (Make sure you do one at a time and use your hands to smooth out any bubbles. After each side is dry I mod podged the outside paper of the box
And there you have it an adorable box . I also did the same thing on a bigger box but used Halloween paper. On the top I put a big orange bow.