Welcome to our Craft blog. We offer an assortment of homemade cards and crafts that are great for decorations, gifts, holidays and other various activities. Thank you for visiting and be sure to come back every Monday and Thursday to see our new ideas. Enjoy your stay!

Thursday, October 14, 2010

Activity Treat for guests

The moment I saw these little apples I fell in love with them! They are the perfect size for making caramel apples with our guests for our Halloween party! To practice my kids and I made some. 
I bought a bunch of tiny apples about 1x1inch, we used 8 for this
1 small package of caramels
1 cup chocolate chips ( I like milk) but you can use all different kinds
three boxes of mini nerds Halloween colors
1/4 cup flavored coffee creamer or sweetened condensed milk
8 skewers

 To make the caramel, I melted the caramel with 1/8 cup of creamer. Then we put the skewers in the middle of the apples and dipped away.
 They are a bit runny so I let them dry a little on Styrofoam.
 We then dipped the caramel in a chocolate solution: 1/8 cup creamer to 1 cup chocolate, I cooked this in the microwave for 20 seconds and then stirred until the chocolate chips were melted and the milk was incorporated. If the chocolate chips need a little bit of warming up, only do 10 sec or less at a time. You do not want to burn the chocolate.
After dipping them in the chocolate we dipped them in the nerds. I know these do not look like martha stewarts, but my kids did them and had a great time! I know your guests will as well.
 You can also use sprinkles, nuts, mini chocolate chips, and mini m&m's to dip them in.

Wednesday, October 13, 2010

The costume!

I asked all of my guests to dress up for the party. My youngest is going to be a fairy this year. I am making her a bead flower tiarra and some pink leg warmers using the instructions from this site:  http://www.whattoexpect.com/blogs/imamommywhatsyoursuperpower/trendy-baby-gear-homemade-baby-legs-tutorial
I am going to show you how I made her tutu skirt. There are a ton of tutorials out there, so here is mine:
1 tutu skirt for a 12 month old:
6 half yards of tulle all different colors. (you may need more if you are doing an older child)
headband elastic
2 same colored flowers
one diamond brad


 I folded my half yard tulle in half, selvage to selvage. Then cut at the fold. I then cut the fabric at three inches the long way, until I had a lot of 3 x 22 inch pieces.
Next I folded the pieces around the hair band in half and tied two knots. I did this with each color until the tulle covered the whole head band.


I took apart the two flowers and added them together using a brad to keep the petals together. I then sewed the flower onto the skirt and tied a green ribbon around it.

I am going to have my daughter wear this with a white onesie, the leg warmers, tiarra, and butter fly wings.

Tuesday, October 12, 2010

Invite the guests

To set the mood for my Halloween party I made some simple cards. I tore the bottom and inked the edge with white stamp ink, and came up with a cheesy poem.
 I used these stamps from http://thebearyscrap.com/category_323/MME-Stamps.htm so cute and way worth the price.

Monday, October 11, 2010

Trick or treat Week!

This week we are going to focus on Everything you need to have a spectacular Halloween. Of course I would love to hear what you do to celebrate Halloween. And I hope these ideas will help you in your Spooky Halloween.
Today we are going to focus on decorations,  Making a spooky table that will knock the socks off of your friends! 
 I found a lot of this stuff at Michaels, but I later on took a trip to All a dollar, which isn't that close to my house, but they have most of this stuff and more for only a buck!
 I bought these flowers already black, but you can buy some roses from all a dollar, or flowers, spray paint them black, dip the ends in glue, and then in purple or sparkle black glitter.
 To make the Frankenstein and witch silhouette frame I found two old silver frames for the thrift store. I then googled on my computer for a free witch or Frankenstein picture. I wanted them to be small so I adjusted the size on windows. I then printed off the faces, and colored in the white space with a black marker. I then cut out the faces and pasted them onto an old book page (off of a book that I also got from the thrift store) I used a match to carefully burn the edges of the paper. (Please do this either outside, or in the bathroom by a tub that has water in it, so you don't burn down your house.) I glued the burnt paper onto a black paper and placed it in the frame.
 This was not my original idea, my sister in law did this at her house, and I thought it was pretty clever. This is a witches spell book. I took a black leather covered old book, the more hashed the better, and I spray painted over any lettering with black. Then I burnt the edges, which took a while because you can only burn a couple of pages at a time. To make the book fold down better I tore some pages out and to give it a more worn look I put water on some of the pages.
 I placed different trinkets on the table to fill up the space, and I wanted to create a little bit of dazzle so I put purple lights under some tissue paper.
I filled up some glass jars with glitter bones, ping-pong ball eyeballs, and water with green food coloring. 

I can't wait to see what your spooky table looks like. 
Tomorrow we will invite the guests!
Thursday, October 7, 2010

Halloween Card

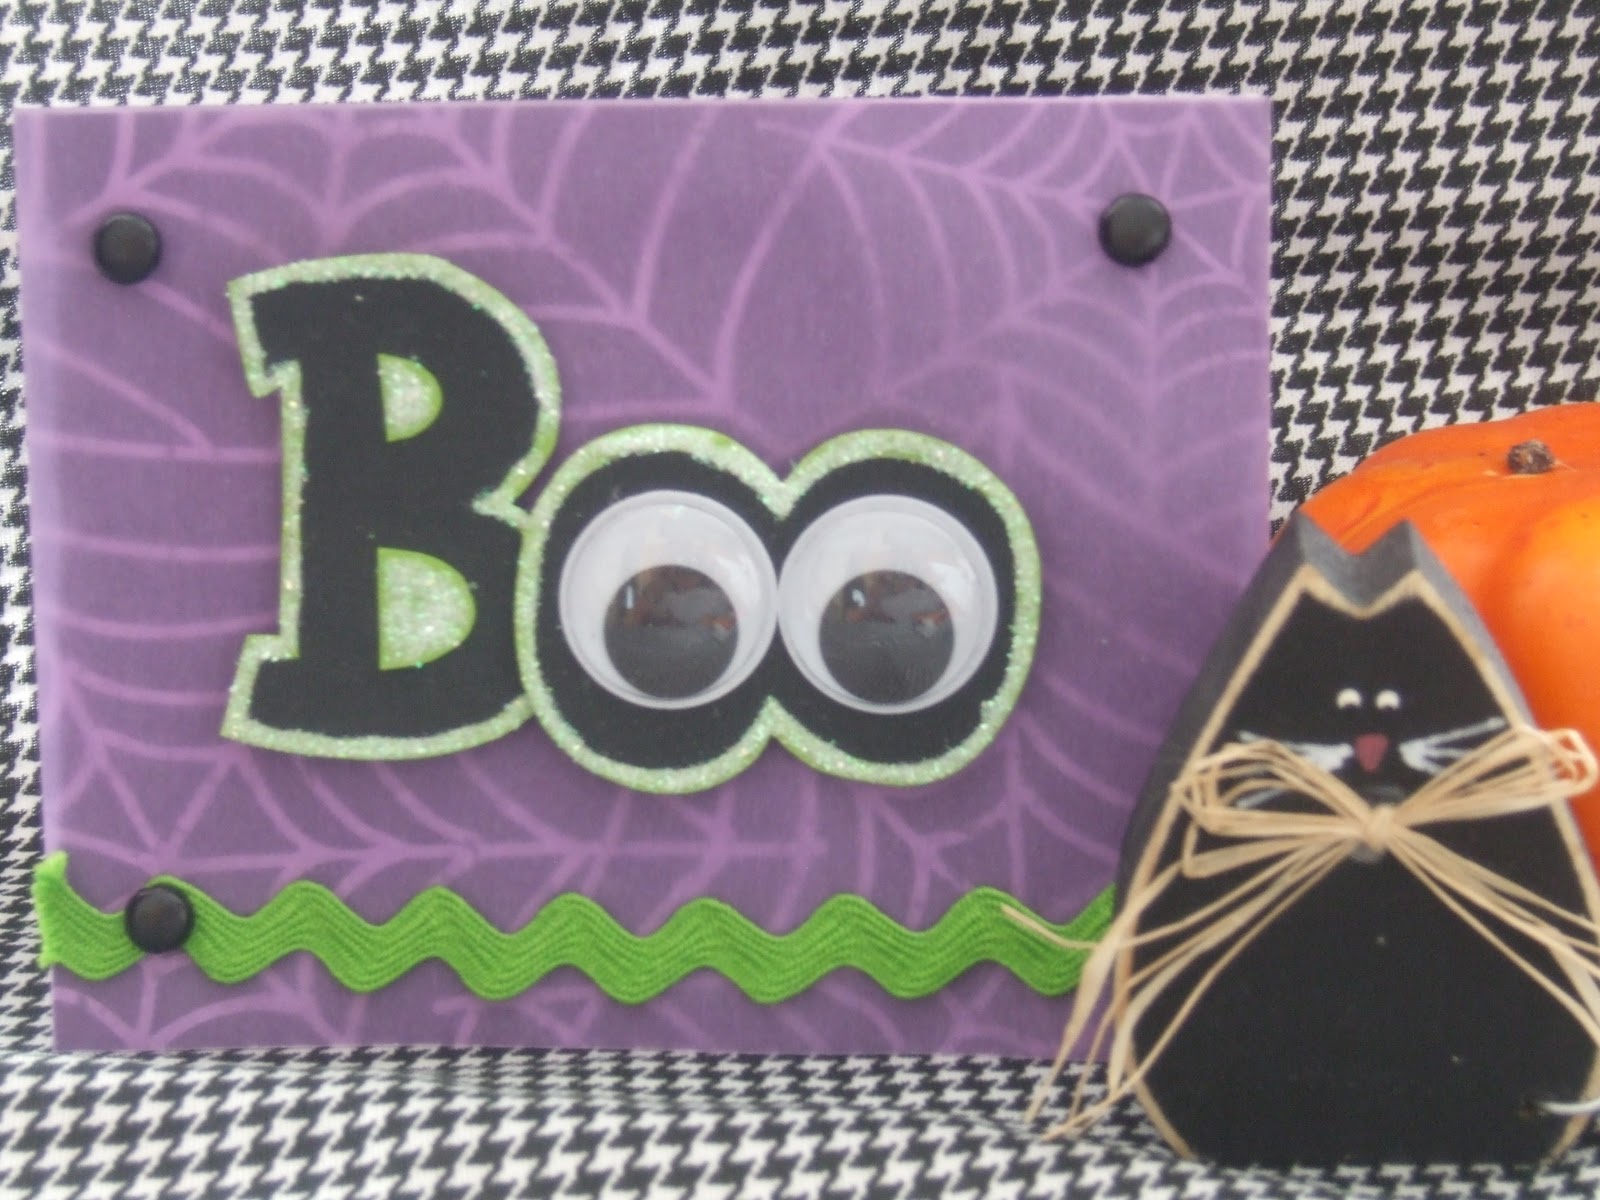
This is my second Halloween card that I made, using the left over paper and brads from the first card.  I made it just like the first one, just changed what I
glued on the front.                                                            
Extras for this card include:                          
lime green solid paper                                
lime green rick-rack
large googly eyes                                     

I drew the boo on a white piece of paper first until it looked how I wanted it to look and fit my googly eyes. To make it easy, instead of cutting the spaces out of the big B, I cut two small pieces of the lime green and glued it to the front of the B so it looks like I cut it out. Then using a pencil I traced it onto a black paper and cut it out.  I laid the cut out boo on my lime green paper,and drew around the boo again.  (in the picture it doesn't show up very well as being lime green) Then I glued the the black boo onto the green paper.  I felt like it needed something more so I used Elmer's glue spread with a toothpick on all of the lime green and added glitter.  Which is why in the picture it looks more white than green, although in real life you can see the lime green through the glitter and it looks really cute.  Then I glued on the googly eyes and added a piece of green rick-rack attaching it under the corner brads.  It is nice to use the re-use paper you already have and end up with 2 cute cards that look different from each other.  Happy card making!

Monday, October 4, 2010

Halloween Card


Since Halloween is coming fast I decided to make a Halloween Card.  I found this black and white spider web print and bought some purple velum to go over the top.  It was super easy.  I made 2 cards using the same paper.  The second card I will post on Thursday.  

Using a basic white card as the base I cut the spider web print and the purple velum the same size as the front of the card.  I used black brads to attach the velum over the print and then glued the print to the front of the white card.

Then comes the super cute spider.  My girls were freakin' out about how cute the spider is and we are now making several of these cards for them to give out.  I used some crazy hairy looking black string for the legs.  You could use yarn also.  I cut the legs longer then I needed to give myself length to glue on the legs and to keep them from fraying I had to burn both ends of the string I used.  I used a black pom-pom for the body, googly eye and a tiny red pom-pom for the nose.  He looked cute without a nose too.  I used hot glue to put the spider together and also to glue him onto the card.  I went through my Halloween stickers and found the spooktacular one that I added and that's it.  A cute, fun, Halloween card.

Sunday, October 3, 2010

Monochromatic Card

I am totally late on this post. Being a mom of three and a full-time teacher is hectic and sometimes life just gets in the way. But better late than never.

My last post was all about using big and bold patterned paper. This post is the opposite. The pattern is simple and the card is more classic looking. The colors in the card are all monochromatic, which means that all of the colors used in the card are shades of the same color (black and white can also be used). I like monochromatic cards because the colors always coordinate well. This card uses pink, but you could use any color.

        Gather your supplies. A simple patterned paper where the pattern and background are the same color, ribbon, flower, brad, and another paper of the same color but different shade or shades as your patterned paper.
        Cut out your card and fold it in half. Then cut a strip of ribbon the same length as your card. Cut the ends of the ribbon on an angle and glue on the ribbon about an inch from the bottom of the card. You can use glue dots or a glue stick.
        Put a brad through your flower. Then use glue to attach the flower on the left side of the ribbon.
        Cut out a rectangle of paper. Stamp or write your message of choice. Then glue the rectangle above the ribbon on the right. Now you're done.
        The ribbon, flower, and paper create a nice group of three. When making cards you always want to use odd numbers, because an odd number of objects is more pleasing to the eye.